Understanding how a lawn mower works means that you can properly maintain it and keep it running smoothly.
With a little maintenance, your mower can significantly extend its lifespan. Part of this maintenance involves changing the blades on the lawn mower.
When blades have been used a lot, they become dull and do not provide you with that clean-cut grass that you hope to see on your lawn.
Changing your mower blades is easy once you know how and you’ll be impressed with the difference you see in the performance.
Here, we are going to discuss what is meant by a reverse thread and why this is important in regard to your mower blades.
What Does ‘Reverse Thread’ Mean?
A reverse thread is also known as a left-handed thread. The thread actually refers to the little ridges that form a helix on the outside of a screw.
Essentially, they are what allows the screw to fit into another object and be held in place.
Normally, threads run to the right which is why we normally say to ourselves ‘lefty-loosey, righty-tighty’ when we are screwing or unscrewing something.
A reverse thread is therefore one that tightens the opposite way to what you may think.
Are Lawn Mowers Reverse Threaded?
Many lawn mower blade nuts are reverse-threaded to the drive shaft of the engine for safety reasons, although this isn’t required by law. An example of a mower that uses a right-hand thread is Cab Cadet.
The majority of single-blade, walk-behind mowers are often reverse-threaded. An easy rule to remember is that blade bolts always tighten in the direction of rotation.
How To Tell If Your Mower Is Reverse Threaded
Turn your mower off and turn it over so you can get a clear look at the blades. There may be some manufacturers markings on the blades to indicate whether or not reverse threading has been used.
Additionally, you can always check the mowers user manual to find this out.
Another way to check which way the thread goes is to try loosening the screw. A small wrench will come in handy here.
If you can undo the bolt to the left, then it is a normal thread. If the bolt loosens to the right, then it is reverse-threaded.
Why Is Reverse Threading Used?
Reverse threading is used in many high-pressure applications such as the fast rotation of lawn mower blades.
If the blades were held in place with a normal threaded screw, as the blades turn clockwise they would loosen the blade as it rotates.
In contrast, reverse threading means that the bolts fasten as the blades rotate so they remain in place.
As you can see, this clever trick is for the safety of the user. Not every lawn mower uses reverse threading, it all depends on the manufacturer.
Removing Your Lawn Mower Blades

The main reason you need to know about reverse threading is when it comes to changing your lawn mower blades. Other than that, you won’t need to spend much time worrying about which way the bolt turns.
Read the user manual of your mower to find the specific make and model of your blades to get an exact replacement. This will ensure your mower will work properly and the blades will stay in place.
If you are unsure of how to remove the lawn mower blades, we have an easy step-by-step guide for you to follow:
Step One
Make sure the lawn mower is off and the spark plug wire is disconnected. This means it’s safe to remove the blades.
Cordless wires only require you to remove the battery to prevent the engine from accidentally starting.
Step Two
Turn the mower on its side so you can access the blades easily. We recommend doing this so the gas tank is facing upward to avoid anything spilling on you.
Step Three
Grab something to keep the blade in place such as a block of wood or an empty plastic tub. Take a wrench and loosen the bolt (or nut) in the direction indicated.
Step Four
Make a note of which way the blade goes onto the mower. The new blade needs to be placed with the same side facing down as the old one.
Remove the blade; this may require some force depending on how long the blade has been there.
Step Five
If you find turning the bolt hard to do, use a wrench with a longer handle to give you more leverage. A breaker bar can be used to lift off the blade if that’s also difficult.
Step Six
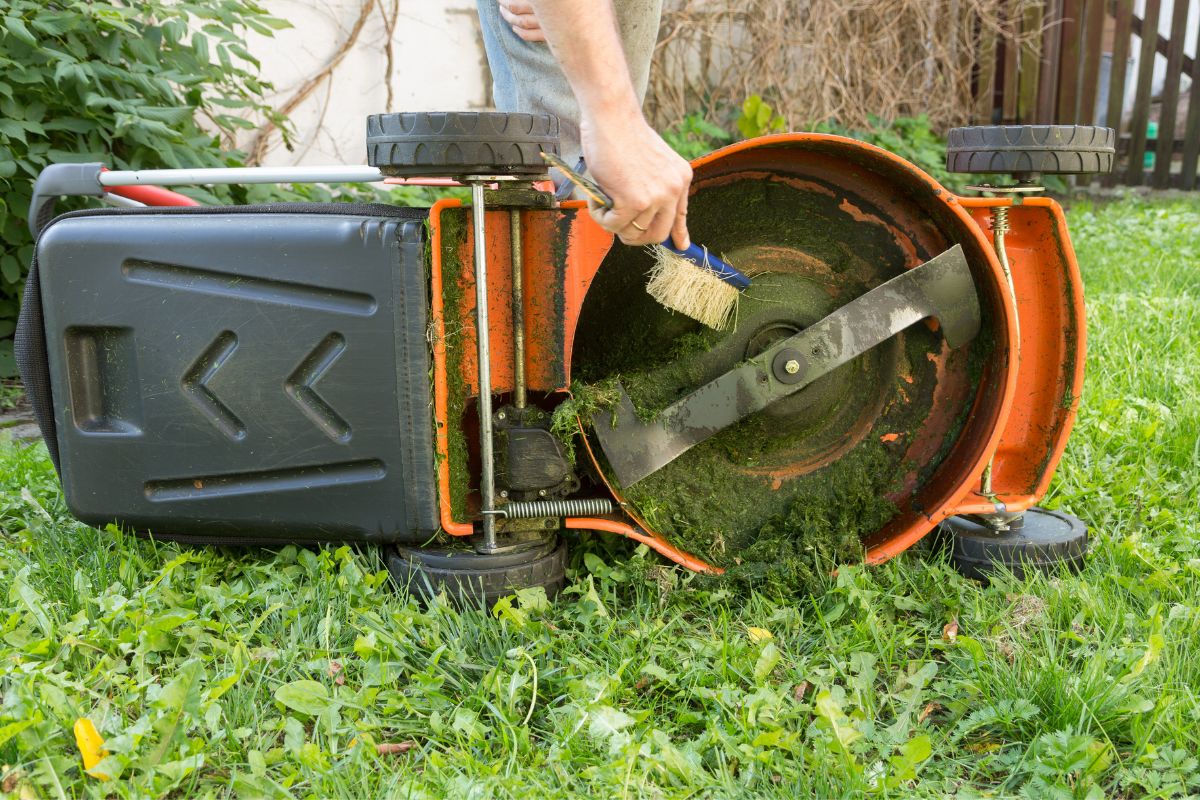
Clean the underside of the mower before placing the new blade on as it’s probably got a lot of dirt and debris trapped here. Use any appropriate tool to remove this, depending on how much dirt and how ground-in it is.
Step Seven
Fit the replacement blade into the original slot, the correct side facing up. Replace washers in the right order and secure the blade in with the bolt.
If you find the bolt keeping the blades in place has corroded over time, replace this with a new one.
The type of bolt should be indicated on the product’s user manual. An exact replacement is needed to make sure all the parts fit together and the blade cannot become loose.
Safety Tips
When changing your lawn mower blade, always wear protective gloves as you may think the blades are dull but they can still hurt you when you remove them.
Blade handling gloves can be bought for a reasonable price from a hardware store or online retailer.
Injuries are all too common when changing blades, but can easily be avoided with the right gear.
The Bottom Line
The thread used to hold a lawn mower blade in place depends on the make and model of the mower. Many manufacturers choose to use reverse threading as the screws fasten as the blades rotate making it much safer for the user.
